

Last Updated on April 1, 2022
Learn How to make your own Modern Christmas Tree for your home.
Setting up real a Christmas tree in your home can be such a pain.
They can leave quite a mess, not to mention the possibility for bugs or mold.
There’s also allergies, if you’re like me and have an allergy to cedar and pine, real Christmas trees simply are not an option.
Plastic Christmas trees might be a good alternative, but they can be almost as messy and as much of a pain to set up and take down as real trees.
Considering all this, I have another alternative that’s cleaner, simpler, and much more unique, here’s How to make your own Modern Christmas!
Material you will need to make your own Modern Christmas Tree
- 4- 2×2, 8 foot pine boards.
- 1- 1×2, 8 foot pine board.
- 2 inch wood screws.
- 1 5/8th inch wood screws.
- 1/4 inch x6 inch long bolt with 2 washers and a wing nut to fit bolt.
- 3/8 inch x 2 inch long bolt with 2 washers an and a wing nut to fit bolt.
Tools you will need to make your own Modern Christmas Tree
- Miter Saw
- Protractor
- Pencil
- Tape Measure
- Drill
- 3/8 inch drill bit
- 5/16 inch drill bit (about a 6″ long bit)
- 3/32 inch drill bit
This tree consist of two triangles, one will be a smaller size than the other.
Let’s Start with the smaller, inner triangle
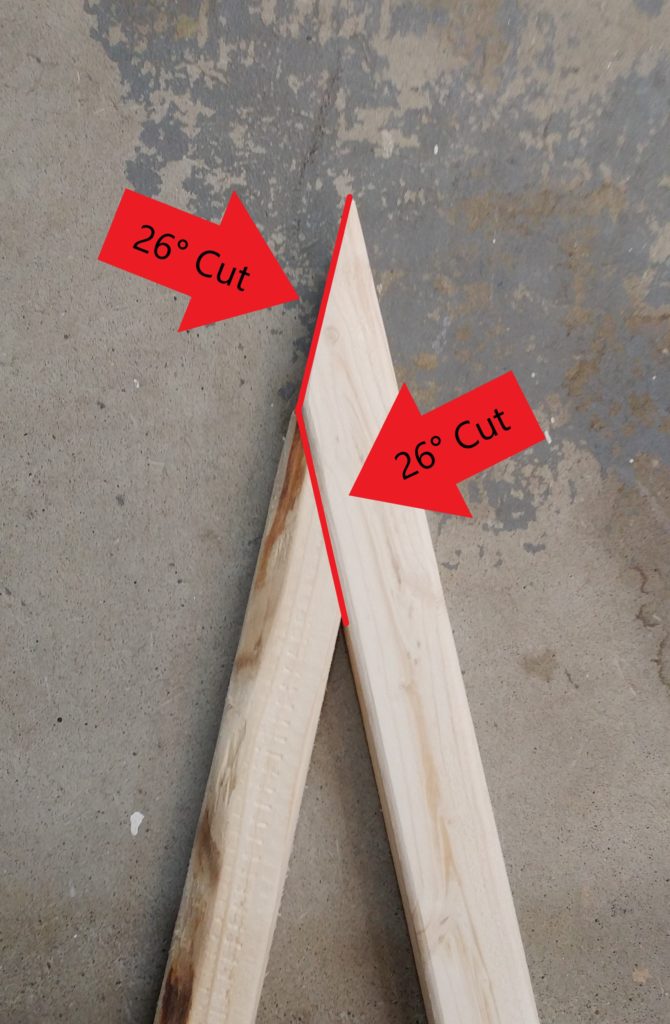
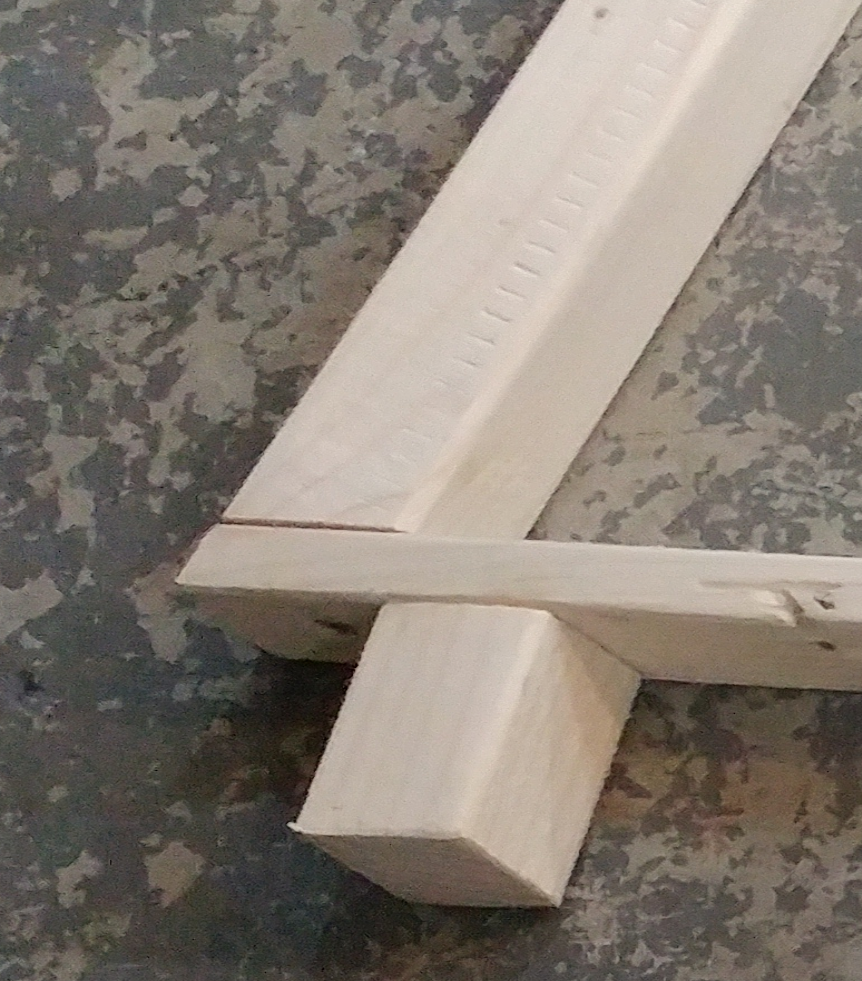
Lay the two 8 foot 2×2’s on the floor and measure one end of each board at a 26 degree angle and cut with a miter saw. Line them up on the ground as I did in the picture.
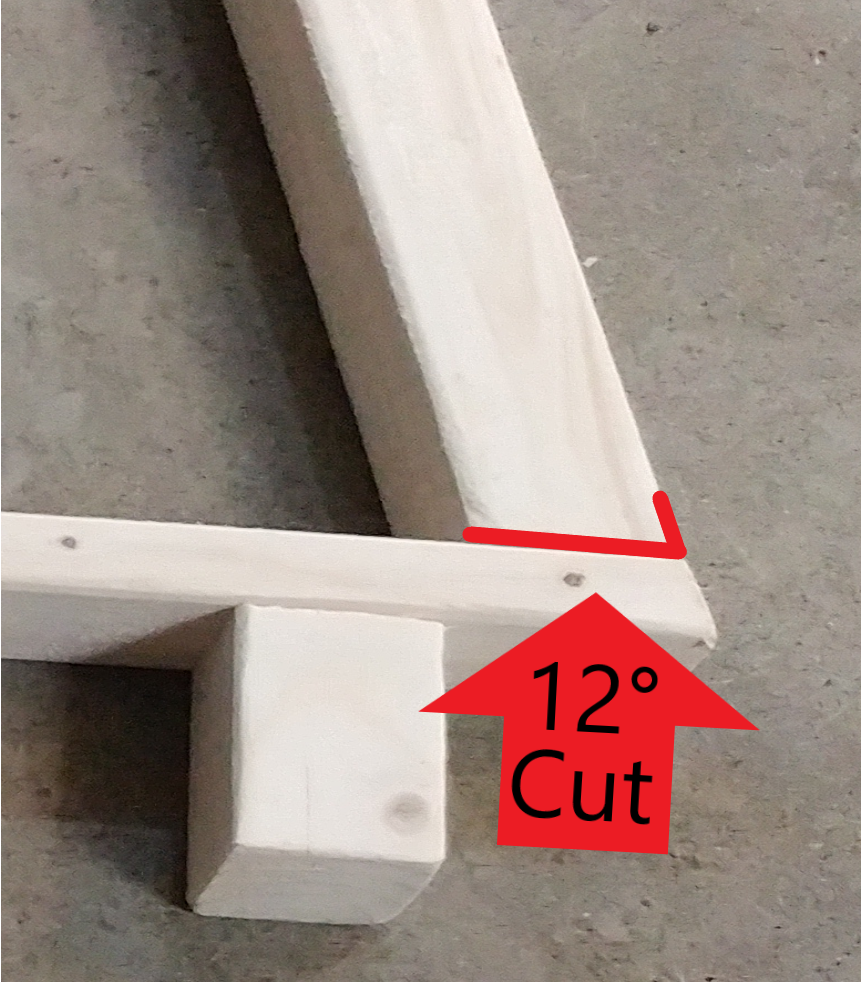
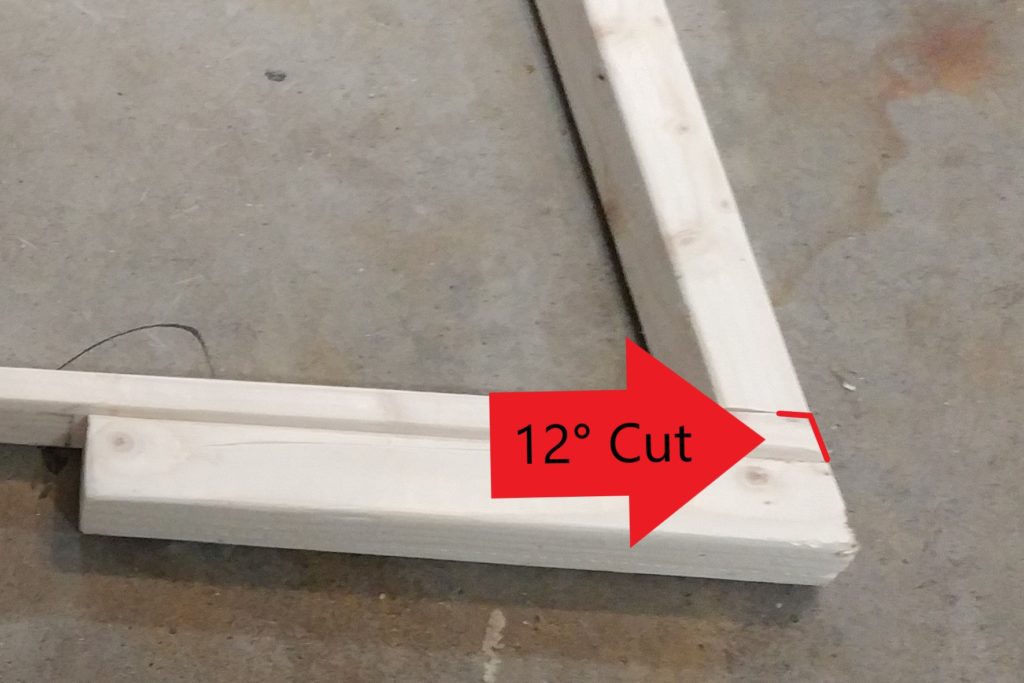
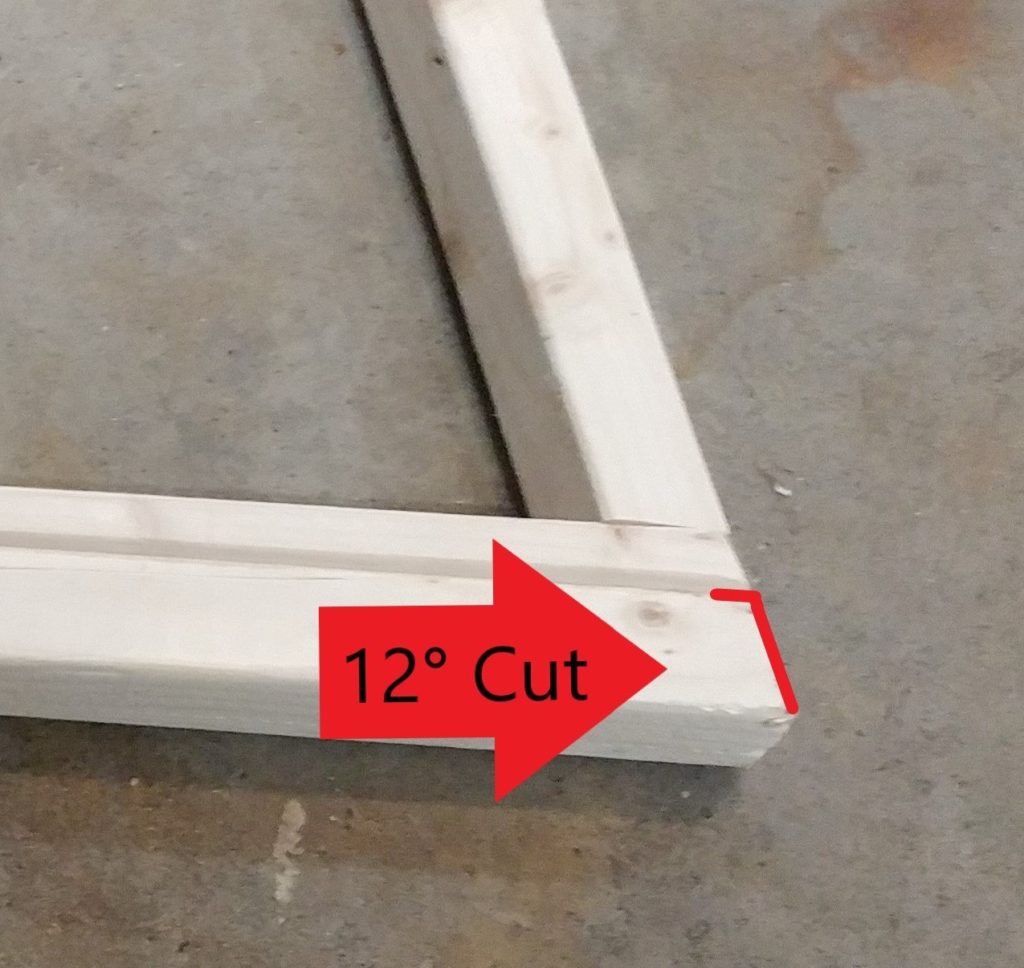
Measure the longest board to 84 inches and the shorter board 80 1/2 inches in length. One board will be a little longer, you want the boards to be straight across from each other at the bottom. At the bottoms, cut both ends to a 12 Degree angle, as was done in the picture.
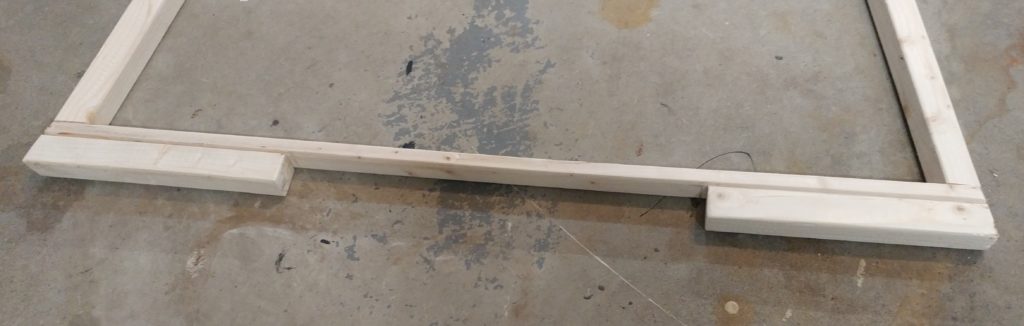
The bottom of the smaller triangle
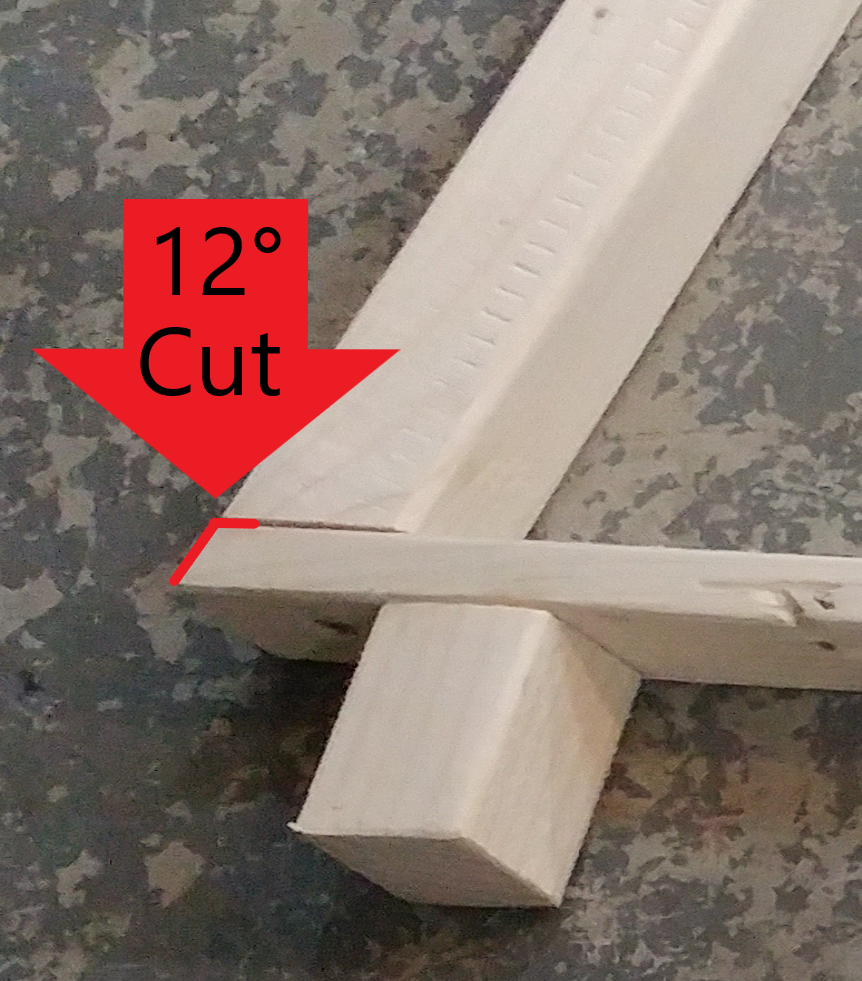
Using a 8 foot, 1×2 inch board. Cut one end of the board to a angle of 12 degrees. Lay this board down at the bottom of the 2 2×2’s, measure out the bottom 1×2 inch board to 34 1/2″ and cut the other end to 12 degrees. This should make a triangle.
After you have all your pieces cut, pre-drill with drill bit size 3/32″ all the hole’s for the wood screws to assemble the triangle. This is the two holes (2 inch wood screws) at the top and one hole (1 5/8th inch wood screw) at the bottom on each side. Assemble the top two first and finish with the bottoms.
The larger outer triangle
Lay out the 2- 8 foot 2×2’s just like you did with the smaller triangle, cutting the tops of these boards at a 26 degree angle. Again, lining them up the same way as the smaller triangle above.
The longest board will be 94 3/8th inches long and the shortest will be 91 inches long. Remember to cut the bottoms of these two boards at a 12 degree angle.
The base of the large triangle
On the bottom of the larger triangle you will cut a 12 degree angle at one end of the 1×2 inch board. Laying this out on the bottom of the 2×2’s. This board should measure about 40 inches across the bottom of the triangle and finish with a 12 degree angle on the other side.
You will again pre-drill with a 3/32″ drill bit. Two holes at the top and one hole on each side, at the bottom. Assemble the top first (2 inch wood screws) and finish at the bottom (1 5/8 inch wood screws), doing everything as you did on the smaller triangle.
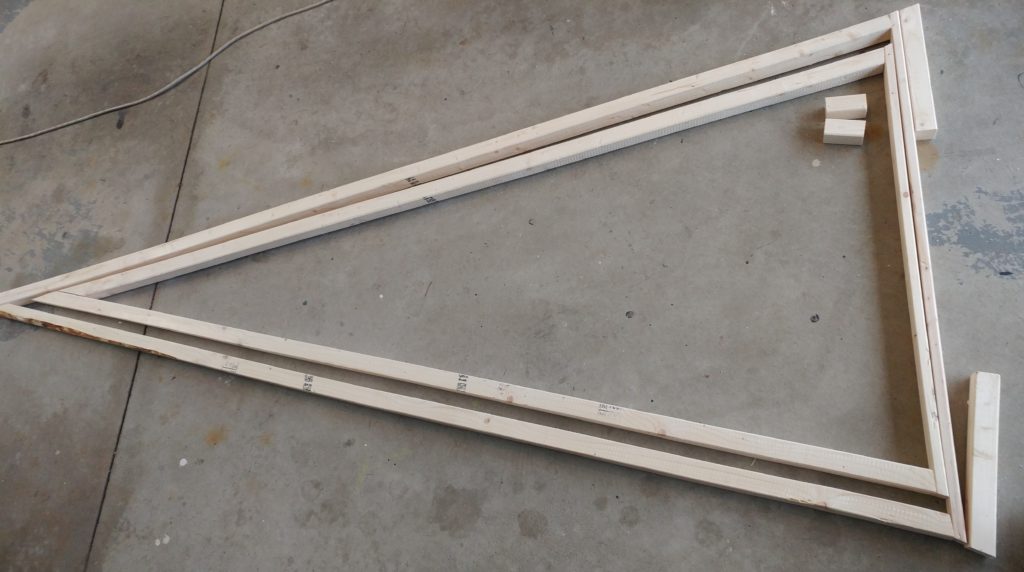
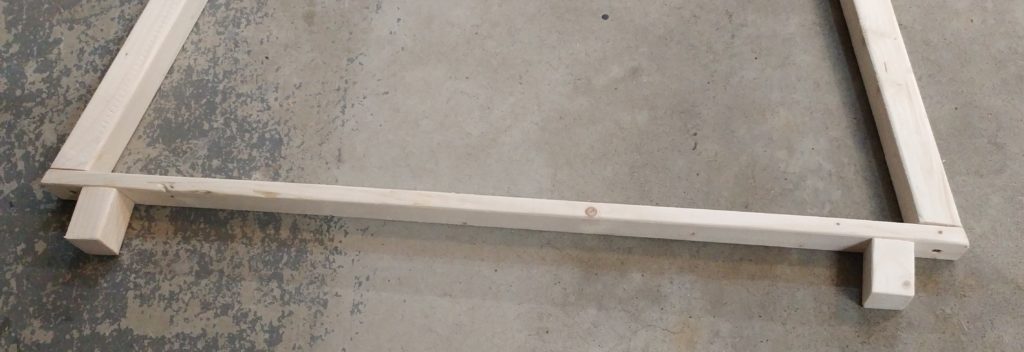
Once the two triangles are assembled, stand them up to make sure the one fits inside of the other.
The Top:
Stand the two triangle’s up with the smaller one inside of the other. Line them up at the top, drill a 5/16th” hole ( a long bit is needed to make this hole) through the side of the larger triangle and through the top of the smaller triangle all the way through the other side on the larger triangle, this will keep the top stable.
The bottom:
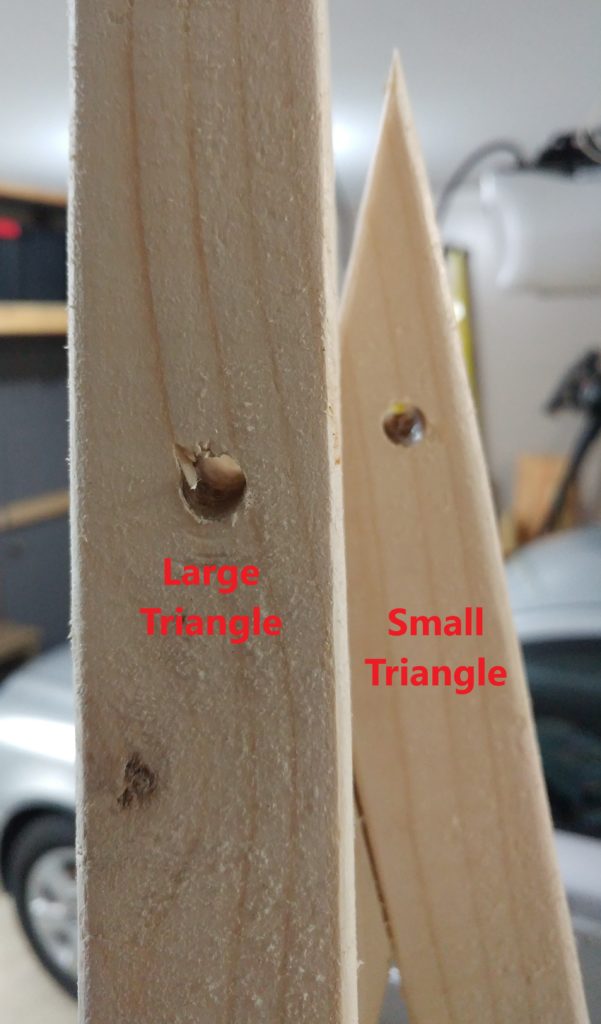
Measure each triangle base to find the center and drill a 3/8″ hole through both triangle’s for your bolt.
To keep the bolt off the ground at the bottom, legs need to be added. I used the left over 2×2 pieces with the 12 degree angle (this can be the pieces you had left over from cutting the longer boards) on each end, for the larger triangle at about 11 1/2 inch each (on the sides).
For the smaller triangle, I used two 2×2 pieces at 2 1/4th inch in length for the legs on each end of the triangle. You will have to pre-drill the holes with bit size 3/32″. Attaching both legs with 2 inch screws.
After you have added the legs and put both triangles together.
Sand any sharp or rough edges.
Once you are done sanding, the wood can be stained, painted, or just leave it as is (natural).
Putting your Tree together:
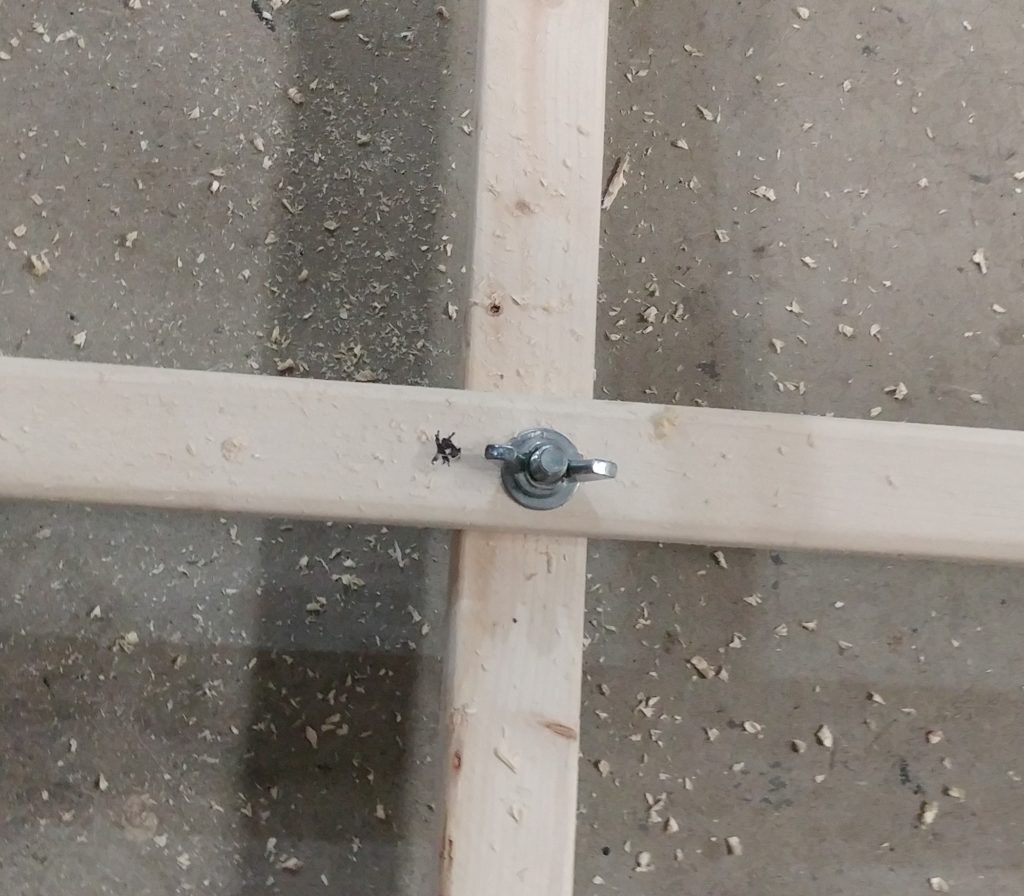
To assemble the bottom, you will use the 2 inch 3/8″ bolt, 2 washers (on the outside of the wood on each side) and a wing nut.
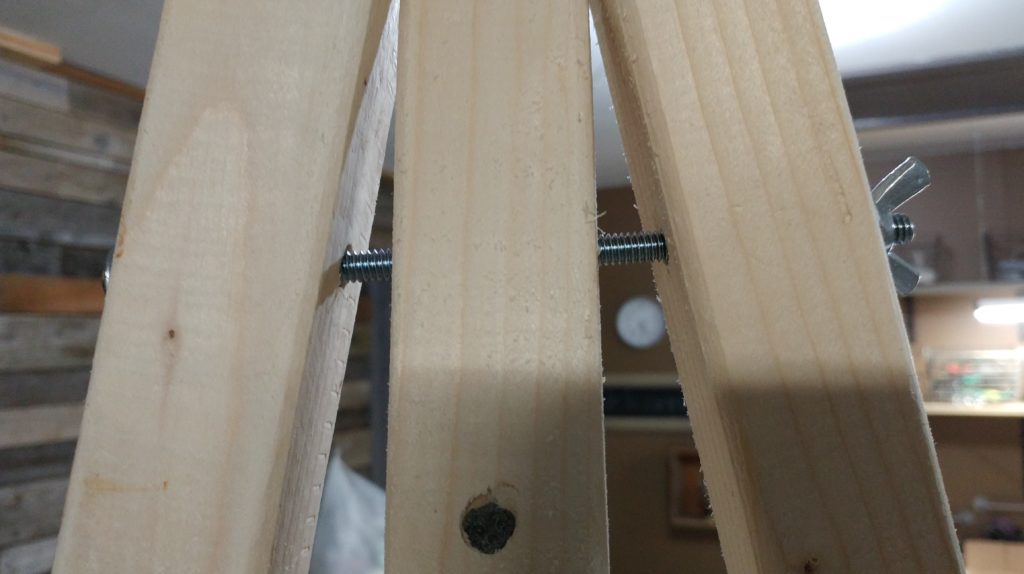
At the top, assemble the tree with the 6 inch 1/4″ bolt. Using a washer on the outside of the wood on each side and finish with a wing nut.
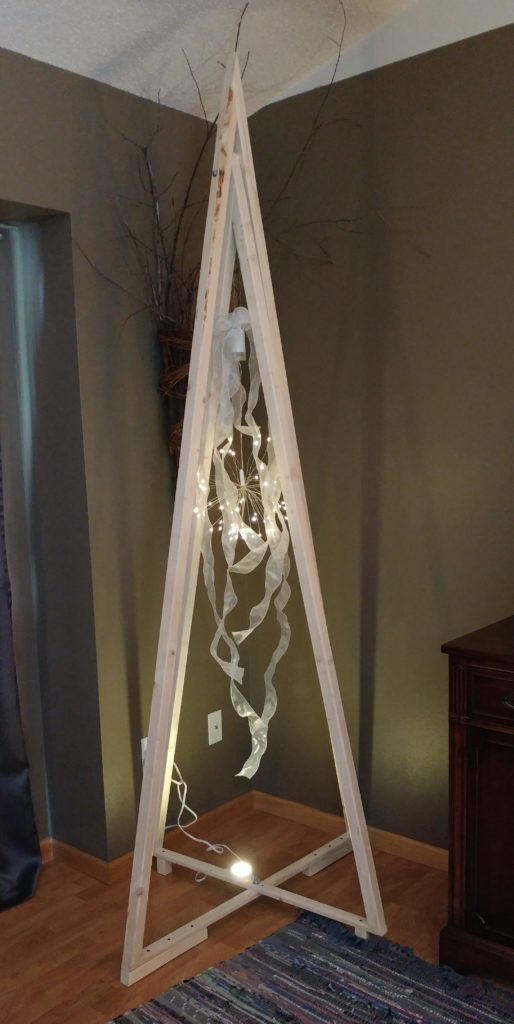
You now have your very own modern Christmas tree!
Storing the tree is simple.
Just unscrew the bolt at the top and remove it (make sure to keep this bolt, washers, and wing nut all together). Next, on the bottom, loosen the bolt without removing it, collapse the tree and tighten the bottom bolt to keep it collapsed.
Tie or strap the top. This will help to keep the top from moving while in storage or while moving it around. Make sure to keep the long bolt strapped on to the tree as well.
Enjoy your Easy to take down and easy to put up DIY Modern Christmas tree!
Disclaimer statement: I am not liable and/or responsible for supplies, construction, results, injuries, hazards or anything related to the making or the outcome of this project.
Leave a Reply